

A dependable water heater provides the hot water your household relies on for showers, laundry, cooking, and everyday cleaning. If you're researching how to install a water heater, understanding the process before you begin can help you make informed decisions and avoid common mistakes. Although some experienced homeowners choose a DIY approach, installing a water heater involves plumbing, electrical work, or gas connections that require careful planning, proper tools, and compliance with local building codes.
Whether you're replacing an aging storage tank or installing a new system, preparing each step in advance helps the project go more smoothly and supports reliable, long-term performance. From choosing the right unit to connecting the plumbing and testing the finished installation, every stage contributes to safe and efficient operation.
If you'd rather leave the job to experienced professionals, JTM Plumbing proudly serves homeowners throughout Omaha, Gretna, and the surrounding communities with expert water heater installation, replacement, maintenance, and repair services. Our licensed plumbers ensure your new system is installed safely, performs efficiently, and complies with local code requirements.
Choose the Right Water Heater Before You Begin
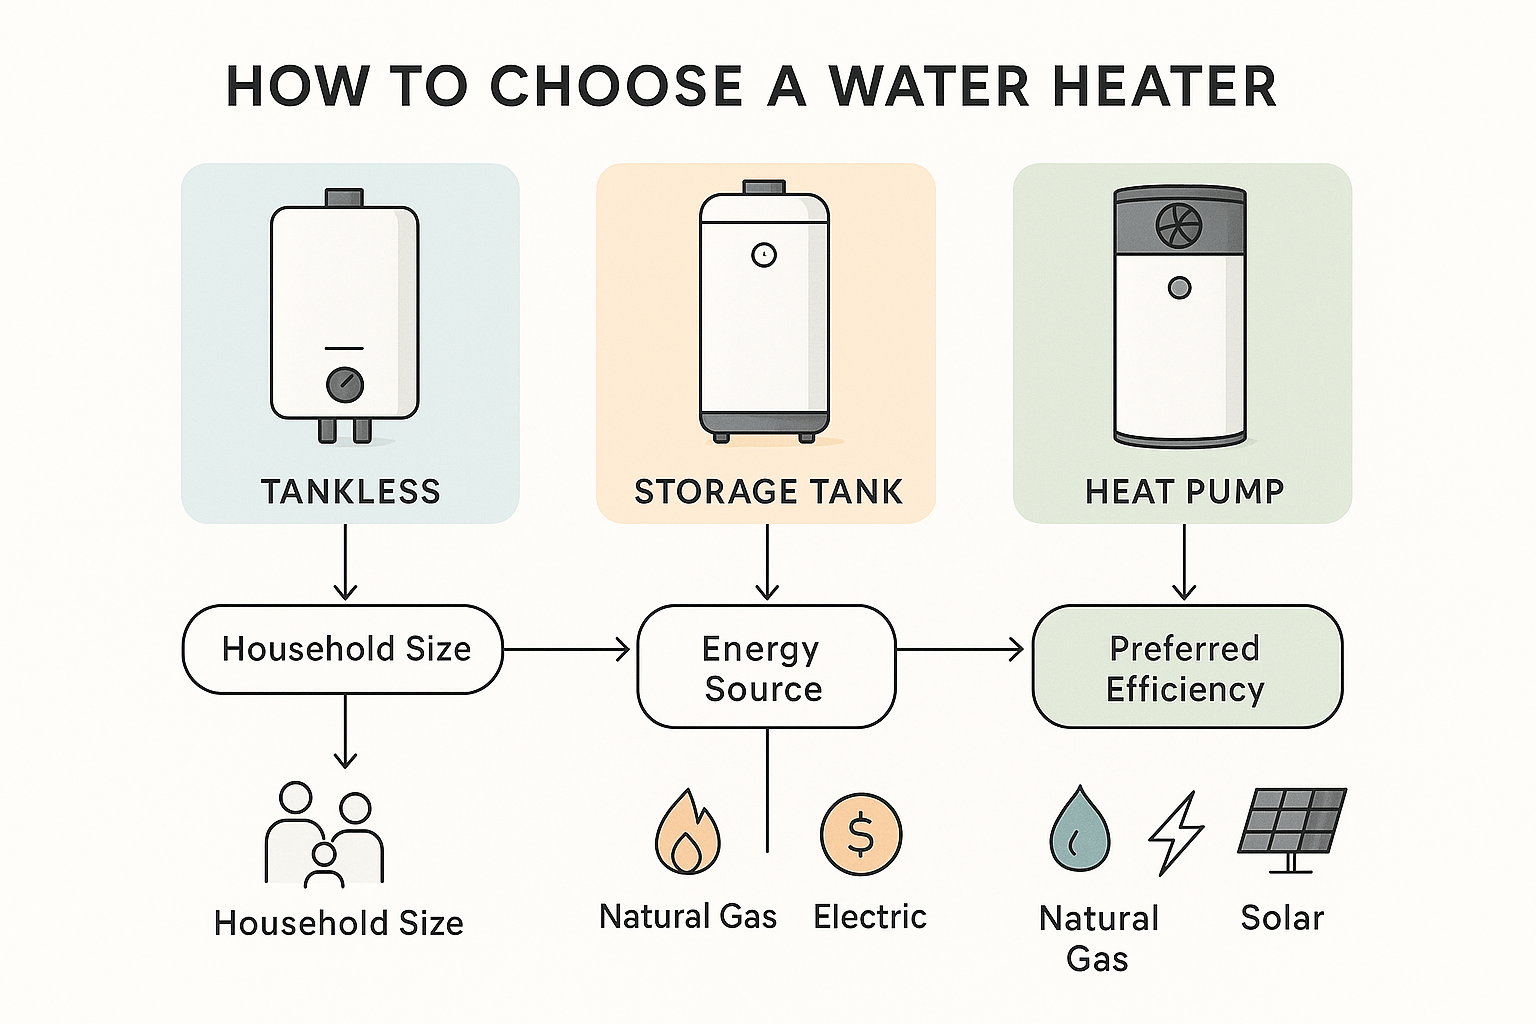
The success of any water heater installation starts with selecting equipment that matches your home's needs. Buying the wrong size or fuel type can result in higher energy bills, inconsistent hot water, and unnecessary wear on the system.
Before purchasing a new water heater, consider these factors:
- Household size and daily hot water usage
- Available fuel source
- Installation location
- Energy efficiency ratings
- Local plumbing and building code requirements
Compare Your Options
- Electric Water Heater
- Best For: Homes without natural gas
- Advantages: Easier installation, lower upfront cost
- Things to Consider: May have higher operating costs depending on electricity rates
- Gas Water Heater
- Best For: Homes with a natural gas line
- Advantages: Faster recovery time and lower operating costs
- Things to Consider: Requires proper venting and a safe gas line connection
- Tankless Water Heater
- Best For: Smaller homes or energy-conscious households
- Advantages: Endless hot water and lower standby energy use
- Things to Consider: Higher installation cost and possible plumbing upgrades
An electric water heater is generally easier to install because it doesn't require gas venting. A gas model heats water faster but involves additional safety considerations when connecting the gas line and ventilation system.
Sizing also matters. A family of five typically requires a larger water tank than a household with one or two occupants. Choosing the proper capacity helps prevent running out of hot water during busy mornings while avoiding unnecessary energy consumption.
If you're unsure which model fits your home, JTM Plumbing can recommend an efficient system based on your family's usage, budget, and existing plumbing.
Gather Tools and Prepare the Installation Area
Once you've selected the new heater, prepare both the workspace and the tools before starting. Having everything ready helps avoid interruptions during installation.
Most projects require:
- Pipe wrenches
- Adjustable wrench
- Screwdrivers
- Tubing cutter (if needed)
- Teflon tape or approved pipe thread sealant
- Flexible supply line connectors
- Bucket
- Garden hose
- Voltage tester for electric units
- Pipe fittings
- New relief valve
- Drain pan if required by local code
- Safety gloves and eye protection
Before moving the new heater into place, inspect the installation location carefully.
Make sure the floor is level and capable of supporting the full weight of the unit once the tank is filled. Remove any clutter surrounding the work area to provide enough space for lifting, connecting pipes, and inspecting fittings.
If local codes require seismic straps, expansion tanks, or drain pans, install those components during the preparation stage instead of after the heater is in place.
Good preparation also includes checking the condition of existing plumbing. Corroded pipes, worn valves, or damaged fittings should be replaced before the new heater is connected. Installing a new system onto aging plumbing often creates leaks that could have been prevented.
Taking time to prepare properly usually saves several hours of troubleshooting later.
Shut Off Utilities and Remove the Existing Water Heater Safely
Safety should always come first before beginning any heater installation.
Start by turning off every utility connected to the old unit.
For an electric model, switch off the dedicated circuit breaker. Never assume the power is disconnected. Always verify with a voltage tester before touching any wiring.
For a gas unit, close the gas line shut-off valve completely. If you smell gas at any point, stop immediately and contact your gas provider or a licensed plumbing professional.
Next, turn off the cold-water supply.
Open the nearest faucet on the hot side of your plumbing system to relieve pressure inside the water tank. This simple step allows the system to drain much faster.
Connect a garden hose to the drain valve and direct the hose toward a floor drain or another safe discharge location.
Once the tank is empty, disconnect:
- Water supply lines
- Electrical wiring or gas connections
- Vent pipe (gas models)
- Temperature and pressure relief valve discharge pipe
Older plumbing connections sometimes become seized from corrosion. Apply steady pressure instead of forcing fittings loose, which could damage nearby pipes.
When lifting the old heater, remember that even an empty tank can be surprisingly heavy. Use a helper or an appliance dolly whenever possible.
Many municipalities have recycling programs that accept old water heaters, making disposal easier and environmentally responsible.
After removal, inspect the surrounding area for water damage, corrosion, or deteriorated plumbing before installing the replacement.
These few extra minutes can prevent future repair costs.
Install the New Water Heater and Connect Every System
With the old unit removed and the area cleaned, you can begin installing the new water heater. Position the unit on a solid, level surface. If your local building code requires a drain pan, place it underneath the heater before making any connections. This provides extra protection if a leak develops in the future.
If you're replacing a traditional tank, verify that the cold-water inlet and hot-water outlet are facing the correct direction. Most manufacturers clearly label both connections.
Next, install the new relief valve according to the manufacturer's instructions. This safety device releases excess pressure if the water temperature or internal pressure becomes too high. Never reuse an old relief valve, as worn components may not function properly during an emergency.
Once the valve is installed, attach the discharge pipe and direct it toward an approved drain location.
Now you're ready to reconnect the plumbing.
Attach the cold-water supply line and the hot-water outlet using approved fittings and thread sealant where required. Tighten each connection securely without overtightening, which can damage threads or fittings.
If you're installing an electric water heater, reconnect the electrical wiring according to the manufacturer's wiring diagram. Confirm that each wire is secured correctly before restoring power.
For gas models, reconnect the gas line using approved connectors and fittings. After tightening the connection, perform a leak test with a soap-and-water solution before turning the gas back on. If bubbles appear, shut the gas off immediately and correct the leak before continuing.
Before restoring utilities, inspect every connection one more time.
Installation Checklist
- Position the heater on a level surface.
- Install the new temperature and pressure relief valve.
- Connect the cold-water supply line.
- Connect the hot-water outlet.
- Reconnect electrical wiring or the gas line.
- Inspect every fitting and pipe connection.
- Confirm all valves are in the correct position before startup.
Once everything is connected, slowly open the cold-water supply valve and allow the tank to fill.
Leave the nearest faucet on the hot side open while filling. This allows trapped air to escape from the plumbing system. When water flows steadily without sputtering, close the faucet.
Before turning on electricity or relighting the burner, inspect every pipe, valve, and fitting for leaks. Even a slow drip can become a costly problem over time.
Only restore power or gas after confirming the tank is full. Energizing an empty electric heater can damage the heating elements within minutes.
Test the System and Keep It Running Efficiently
After installation, spend a few minutes confirming that every component operates correctly.
Set the thermostat to approximately 120°F. This water temperature provides comfortable hot water while helping reduce energy use and lowering the risk of accidental scalding.
As the heater begins operating, inspect the unit carefully.
Watch for:
- Water leaks around fittings and valves
- Drips from the relief valve discharge pipe
- Unusual noises during heating
- Fluctuating water temperature
- Slow hot water recovery
Allow the system enough time to heat a full tank before testing hot water throughout the home.
Regular maintenance helps extend the life of your heater and reduces unexpected breakdowns.
A simple maintenance schedule includes:
- Flushing sediment from the tank once each year
- Inspecting the relief valve for proper operation
- Looking for corrosion around pipe connections
- Checking the area beneath the heater for moisture
- Monitoring water pressure if pressure problems develop
- Replacing worn supply lines when needed
Sediment naturally builds up inside storage tanks over time. Flushing the unit helps improve efficiency, protects heating elements, and extends the system's lifespan.
If your home has hard water, periodic maintenance becomes even more important because mineral deposits accumulate faster.
Tankless systems require maintenance as well. Although they don't have a storage tank, periodic descaling keeps heat exchangers operating efficiently.
If you notice inconsistent hot water, rusty water, unusual noises, or frequent cycling, schedule a professional inspection before the new water heater becomes the only option.
Trust JTM Plumbing for Professional Water Heater Installation
Installing a new water heater requires careful planning, attention to detail, and a strong focus on safety. While experienced homeowners may complete some installations successfully, projects involving electrical wiring, gas line connections, plumbing modifications, or code compliance are often best handled by licensed professionals.
At JTM Plumbing, we provide dependable water heater installation, replacement, maintenance, and repair services for homeowners throughout Omaha, Gretna, and surrounding Nebraska communities. Whether you're replacing an older storage tank, upgrading to a tankless system, or installing a new electric water heater, our experienced plumbers complete every project with quality workmanship and attention to local building requirements.
We'll help you choose the right unit for your household, install it correctly, verify every connection, and ensure your system delivers reliable hot water from day one.
If you're planning a water heater replacement or need professional advice before starting your project, contact JTM Plumbing today. Our team is ready to answer your questions, recommend the right solution for your home, and provide dependable service you can count on for years to come.


.svg)
.webp)